By Sleepy Diva
A trip to Disney is magical and exciting, but the fun for me starts before I even step foot on property. I love planning for my trips almost as much as the trip itself. In addition to planning out the details, I love to do crafts, such as making matching shirts for my family. I have made quite a few shirts for my past trips so for my upcoming trip I wanted to do something new. I decided to try my hand at making my own Minnie ears. I always browse the selection at the parks but I’m going to be honest, I never seem to find a pair that I just love. Making your own gives you the option to choose exactly how you want them to look and they are cheaper; who doesn’t love to save a little money?
I bought all of the items to make the ears at Jo-Ann’s but any craft store will do. Jo-Ann’s had such a great selection of Disney fabric that I couldn’t decide on just one; so I ended up with three different patterns. To make the ears you will need:
- Fabric (two different patterns, one for the ears and one for the bow) – I got 1/4 yard of each pattern
- Foam Circles (4 inches in diameter)*
- Liquid Stitch
- Batting**
- Headband
- Hot Glue Gun & Sticks
- Scissors
- Anything you would like to use for embellishments
- Iron
- Thin towel
- Something round and bigger than the foam circles
Notes:
* I found the foam circles in the kid’s craft section. I felt like they were the perfect size. If you can’t find them or would prefer your ears a different size, you can get a sheet of foam and cut your circles out. The pre-cut circles came in a bag of 12. They were a little thin so I glued three circles together to make them my desired thickness.
** At Jo-Ann’s you can choose how much batting you would like to buy. However, once I finally found it (back by all the pillows), the line to get it cut was long and I didn’t want to wait again. Instead, they had bags of Buffalo Snow on sale so I got that instead and it worked just fine.
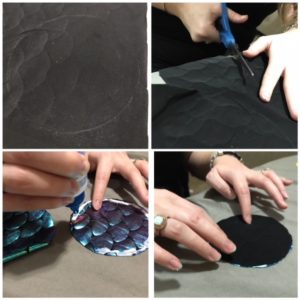
Time to get to work! When you use the liquid stitch to glue your fabric together, the glue is going to spread. You will need to find something round that is a little bigger than your foam circles to trace onto your fabric before cutting. Anything around your house will work; I used the top of a sugar jar from my kitchen. My fabric was about 3/4 in. longer on each side compared to the foam circles and that worked well. Trace four circles onto your fabric and cut them out.
Tip: If you are using a dark fabric, use a white colored pencil to trace your circles so you will be able to see where to cut.
Now that your fabric is cut, you need to glue it together with the Liquid Stitch. Squeeze out a thin line of Liquid Stitch around the edge of two of the fabric circles. Take the remaining circles and place one on top of each circle that has the glue. Remember to glue the fabric together with the pretty sides facing each other on the inside and make sure your patterns are facing the same direction. Once the glue is dry, you will be flipping the fabric inside out.
Place a thin towel over your fabric circles and slowly run an iron over them. This will help seal the glue and give you a nice seam. Set your fabric aside to cool.
While your fabric is cooling, you will need to get your foam circles ready. As noted above, the foam circles were a little thin so I glued three of them together using the hot glue gun to make them a little more sturdy.
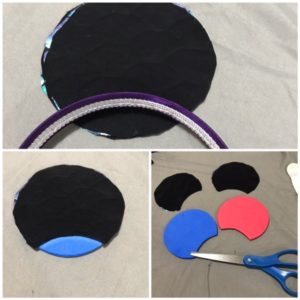
I cut my fabric too small the first time. You do not want your fabric to be the same size as the foam circles
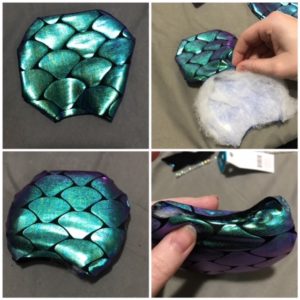
Once your fabric has cooled, take your headband and place it over your fabric circles to find the desired height of your ears and trace a line on the fabric. Cut along the line to create the opening that you will use to stuff your ears later on. I found it easiest to draw the line on one ear and then stack the two and cut them at the same time, just be sure to cut slowly. After cutting your fabric, you will need to do the same to the foam circles. You can either place the headband on top and trace a line just as you did with the fabric, or place the fabric on top of the foam and trace the line from the fabric.
*Please note that in my picture the fabric looks to be almost the same size as the foam. I was not anticipating how much the Liquid Stitch would spread and did not cut my fabric large enough the first time. Learn from my mistake and make sure your fabric is at least 3/4 in. longer than the foam on each side.
Now to prepare your “stuffing” for the ears. Place your foam over the batting and cut around the foam. You will need to do this four times so that you have a piece of batting for each side of the ears. Glue your batting to the ears*. Take a thin strip of batting and glue it around the outside of the ear; you do not need to put it along the bottom.
*Note – For the first set of ears I used the Liquid Stitch to glue the batting but on the others I used hot glue because the Liquid Stitch seeped through the batting too much (this may also be because I used the Buffalo Snow instead of actual batting). If you use hot glue, be careful not to burn yourself applying the batting to the foam.
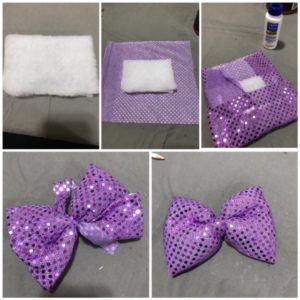
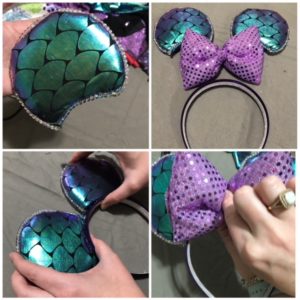
Next up, the bow! Cut out a rectangle of batting; for a fuller looking bow, cut out a large piece of batting and fold in half. There is no specific size, it just depends how big you want your bow. For the Ariel ears I did a large bow, but the bows for my other two sets of ears were much smaller because I wanted the design of the fabric to be visible.Take the fabric for your bow and cut out a piece large enough to cover the batting. Fold your fabric over on the short sides first and glue to the batting. Then fold one of the long sides and glue down, followed by the remaining side. Cut a thin piece of fabric and tie around the middle to shape your bow. Make sure you tie the fabric on the side that you glued. To make sure it would stay tied, I placed a small amount of hot glue on top of the knot and tied it one more time.
Now to stuff your ears! Flip your ears inside out so that now the pretty side is visible. Carefully stuff the batting covered foam inside the fabric. You will probably need to fold your foam some to get it inside the hole you created on the bottom. Once you have everything the way you want it, you need to close up the bottom of your ear. If you have enough fabric, you can just fold it over and glue down. If not, cut a small strip of the fabric that matches your ear and glue it over the opening, I used the hot glue for this.
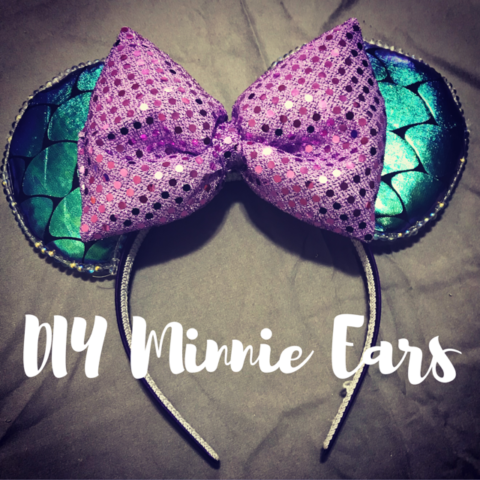
You are now ready to assemble your ears. If you are going to add any embellishments to your ears, do this before gluing the ears to the headband. I found these strands of iridescent beads in the jewelry section and used the hot glue gun to glue them around the outside of my ears.
Lay everything out to determine your placement before gluing. Once satisfied, use the hot glue gun to glue your ears to the headband one at a time. Make sure to hold the ear in place and give the glue a chance to dry before releasing the ear. After your ears are glued in place, hot glue the bow to the headband.
You’re done; you now have your own unique pair of Minnie ears to sport at the parks!
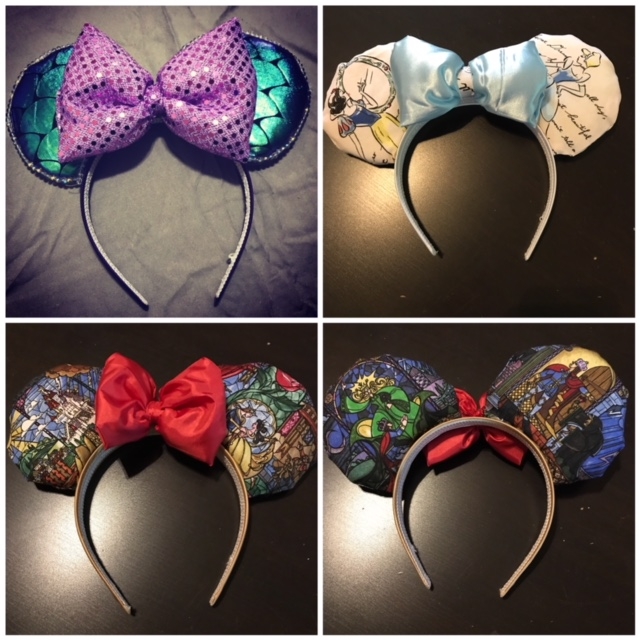
I was so impressed with how these turned out. If I am being honest, I thought it may end up as a Pinterest fail, but it didn’t! The first pair probably took me about one and half to two hours (it didn’t help that I cut my fabric too small the first time), but the other two were much easier because I knew what I was doing. Here’s a look at all the ears I made:
Are you ready to make a trip to the parks with your Minnie Ears? Visit our Diva travel agent Patricia at All For Dreams Travel to help you plan your magical trip. Click here to request a quote.
