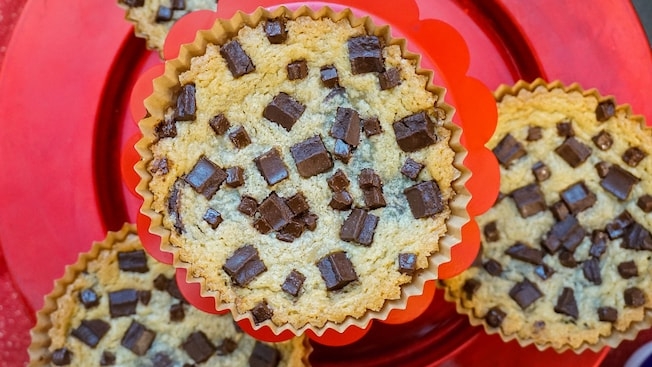
You’ve just finished your high-speed ride on The Incredicoaster, and while you about halfway through the ride, you smelled the delicious scent of Jack-Jack’s cookies. Now that your tummy has settled from being upside-down, you head to the stand just past the exit to grab one of the Jack-Jack Cookie Num Nums for yourself. Luckily for everyone not at Disney California Adventure Park right now, Pixar posted the recipe for Jack Jack’s Num Num cookies on their Instagram page! We made them and have a few hints on how to create them for yourself.
Step 1 – Collect the ingredients. Since you only need an egg yolk, you will still need two eggs, but just the yolk from one of them. When it comes to salted vs unsalted butter, most bakers will tell you to use unsalted so that you are not adding extra salt to a recipe that alters the flavor. This recipe did not clarify which to use, and we only had salted butter on our house and used that. If you don’t like extra salt and only have salted butter, consider not adding the 1/4 teaspoon of salt called for in the recipe.
- 1 cup butter (2 sticks)
- 1-1/4 cup brown sugar
- 1 egg
- 1/4 cup sugar
- 1 egg yolk
- 1 teaspoon salt
- 1 teaspoon vanilla
- 1 teaspoon baking soda
- 2-1/4 cups flour
- 1 cup chocolate chips
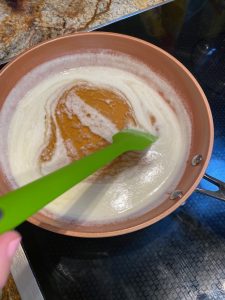
Step 2 – Brown the butter and let it cool until it begins to solidify. Now if you are anything like me, who is an average baker, you may not know how to brown butter. Browning butter brings out a bolder flavor, so you don’t want to skip this step. Here are a few tips:
- Take the butter out of the refrigerator about 20-30 minutes before starting, as cold butter can splatter and easily burn.
- Cut the butter into pieces so it cooks evenly.
- Use a light-colored pan so you can see when the butter has browned
- Use a wooden spoon, silicone whisk, or rubber spatula to stir.
- Turn the heat onto medium to ensure the butter cooks evenly. It will start to foam and then it will begin to turn brown.
- Keep stirring so it doesn’t burn! It took us a little more than 5 minutes to get from start to finish on our butter browning.
- Once browned, immediately remove the butter from the pan and put it into a heatproof bowl so that the cooking process stops. Be sure to include any of the brown specs at the bottom of the pan as those have great flavor.
After we browned our butter, it took a while for it to begin to solidify. We got tired of waiting and put it in the refrigerator to speed up the solidification, but even then we waited a good 30 minutes between when we browned the butter and when we moved onto Step 3.
Step 3 – Cream butter, sugars and salt in a mixing bowl until light and fluffy. Put all the ingredients together in the same bowl, including both the brown and white sugar, and whisk until they are combined and have a smooth consistency. We used a medium-high speed on our mixer for about 5 minutes and made sure to scrape down the bowl.
Step 4 – Mix in the whole egg, egg yolk, and vanilla. I am pretty particular about my vanilla and I think this is one ingredient that can bring your cookies to the next level. We went to French Polynesia in 2002 and fell for their vanilla extract. It can be purchased online if you want to plan. We buy ours from Vanilla From Tahiti, and while it is more expensive compared to grocery store vanilla, it is worth it!
Step 5 – Combine dry ingredients and mix to the batter. We started at a lower speed on our mixer and moved it in speed up as the ingredients started to combine, but we never went past medium speed.
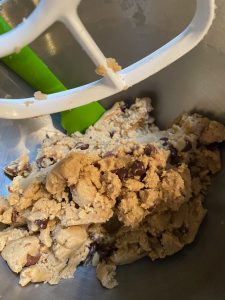
Step 6 – Add chocolate chips. The recipe does not state if you should use milk chocolate or semi-sweet chips. We had both, so we used half and half. You could use all milk chocolate or all semi-sweet based on the taste preferences in your family. We then put our mixer on medium-low to pull the chips into the dough.
Step 7 – Scoop into balls and chill thoroughly, at least an hour, preferably overnight. We didn’t have room in our refrigerator to put all the balls on cookie sheets, so we just chilled the bowl overnight. When we pulled it out the next morning, we did have to let it soften slightly to make the cookie balls. I think it would have been better if we had made the room for the cookie sheets, so give that a try and plan to make room.
Step 8 – Bake at 350-degrees for 7-10 minutes until golden brown on edges but still soft in the center. Here is where everyone’s oven will vary. So make sure you check the cookies right at 7 minutes and then every minute after that so they don’t burn. I use parchment paper on the bottom of my cookie sheets, and then cool the cookies on a cooling rack.
Step 9 – Enjoy! We made about 2 dozen cookies with this recipe. If you decide to make really large cookies like the ones they sell at Disney California Adventure Park, then you will make less. You can also make them in the wrappers as they do in the Park to really make it like you are there!
If you are looking for other Disney at home recipes, here is one for Dole Whip, or if you are not in the mood to make a Disney snack, check out my article on Disney Snacks to Enjoy at Home.
***Disclaimer – We at Tips from the Disney Divas and Devos hope you enjoy reading our articles and encourage you to share any you feel may be of interest to someone else. We do ask, however, if you choose to share the photographs attached to our articles, you give credit to the photographer. Thank you for your cooperation and for sharing our love of Disney!

