By Pink Diva
Do you want to add a little Disney magic while you countdown to Christmas? Christmas will be hear before we know it, so I have put my crafting skills to work and am pleased to bring you 4 easy countdown crafts. I was able to make most of these in one morning with supplies I had lying around the house. Most of the supplies can be purchased at a dollar store making this an affordable project as well!
Kid Colored Countdown:
Supplies:
- Picture Frame
- Print Out
- Crayons/Markers
- Dry Erase Marker
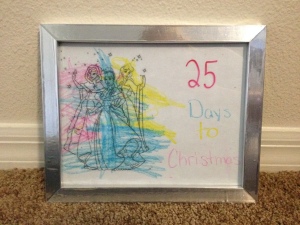
This was by far the easiest countdown project to make. I searched the internet for the picture, printed it out and had my kids color them. My daughter requested Cinderella and Belle together while my son was happy with Mickey. When printing your picture, make sure you leave enough room to do the counting down. I put the princesses on the left side, leaving the right side open to write “Days to Christmas” and the number. Once the picture was colored I wrote “Days to Christmas” and put it in a frame I had on hand. After testing that the dry erase marker would work (it did!) I wrote “25.” The kids loved being able to make something for Christmas, it wasn’t stressful for me and was very little cleanup!
Tip: You can use anything for the artwork. Coloring pages, blank paper for original artwork, even stickers. Let the kids have fun with it.
Card Countdown
Supplies:
- Picture Frame
- Scrapbook Paper
- Numbered Cards
- Hole Punch
- 3M Hooks

The Supplies
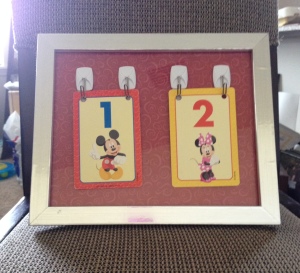
This project was pretty easy. You can get as elaborate as you want with the frame, paper and cards. I had these cards lying around the house, but I found them at Dollar Tree. This set only went up to 20, so either have a set that goes to 25 or buy two sets so you can do two cards each with one number on it. I opted to do two cards, one with each number. I used red patterned scrapbook paper and put it in the frame. I used the hole punch and put two holes in the top of each card. I attached the 3M strips to the frame and hung up the cards. Getting the hooks lined up was the hardest part. I choose to put in on a frame so that it would easily sit on the counter, but you could put the 3M hooks anywhere you wish. A bathroom mirror, refrigerator or door. Wherever you like since they usually peel off easily.
Tip: Once your countdown is done put the cards on circular book rings. They are great to have in restaurants, car rides and while waiting in the lines at Disney!
Muffin Tin Countdown
Supplies:
- Muffin/Tart Tin
- Paper
- Art Supplies
- Scissors
- Tape/Magnets
- Filler
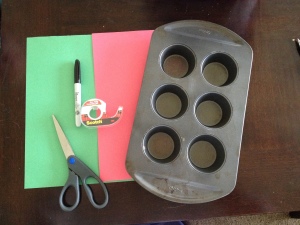
This one gets a little trickier than the previous ones. I used a six-opening muffin tin for this article, but the 24-opening tart tin (small muffin tin) works great. If you are going to use one of your own muffin tins, make sure you are not going to need it for the whole month. Next, pick out your paper. I went simple with Christmas red and green. This is where you can let your craftiness get wild! Decorative paper, stickers, markers, anything you want! Please don’t laugh at mine-I know my Mickey’s look a little more like bears. I promise to work on it. Or at least stock up on Disney stickers.
Cut out your paper a little larger than the openings. I traced a peanut butter jar lid to get my circles. I opted to tape my circles on. Magnets work as well, but my little guy still likes to put things in his mouth and I don’t want him to swallow a magnet. Because this one has openings, you need to fill it. You can fill it with whatever will fit. Hershey kisses, stickers, or any small surprise works well.
Paper Chain Countdown
Supplies:
- Paper
- Scissors
- Glue
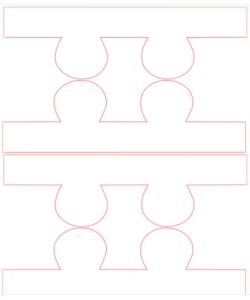
This was the hardest project to complete. It took more time and patience than the other countdowns, but still easy. I printed out this handy template:
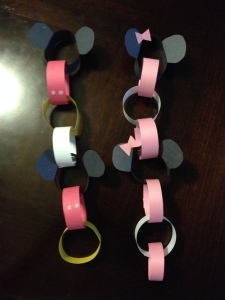
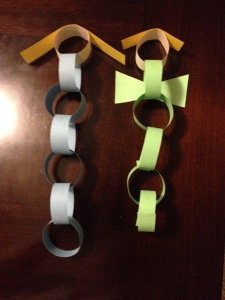
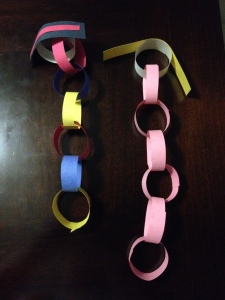
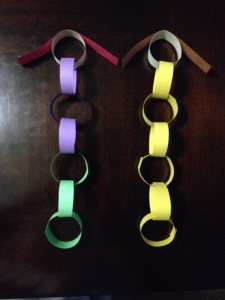
I used this template to make both Mickey and Minnie’s ears. I traced it without the ears as well to give me the other strips in the chain. Then all you have to do is glue the strips into a chain. I used a glue stick so the strips would easily break off each day. If you are repeating a pattern you need four separate strips. That way the ears are always facing forward. One strip (or loop) is one day.
Tip: Besides countdowns, paper chains make great Disney door decorations, Christmas tree decorations, interesting table runners and festive birthday decorations!
I also made a few princess paper chains. The beginning of the princess chain is the hardest, but after that it was easy since I only worked with the color of their dress. I used the Mickey Ears template without the ears to make the strips. I added a strip for hair, but you can add accessories or decorate the chain dress to make them as festive as you would like.
Counting down to something is always fun. You can use these projects to countdown your next trip to Disney, birthday, special celebration or days until the weekend!


